Publish the site
[[Publishing]]
- Publishing a site means putting the project in GitHub and letting GitHub Pages build the public website from it.
- You edit the Markdown files.
- GitHub stores the project history.
- GitHub Pages serves the finished
site/folder.
[[GitHub]] repository
- Create a GitHub account.
- On GitHub, open New repository.
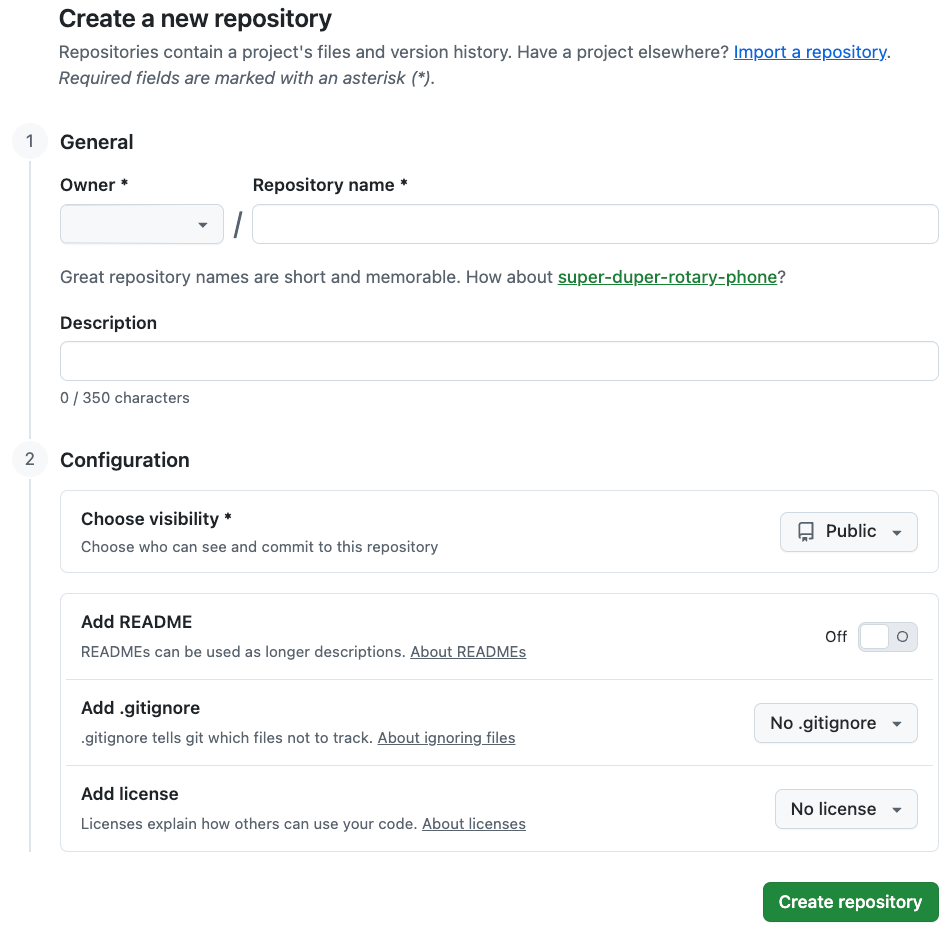
- General
- Owner: Choose the account that will own the site.
- Repository name: Write the repository name, such as
course-notes, orresearch-methods.
- Configuration
- Choose visibility: Select Public, unless you already know your GitHub plan (paid) supports the Pages visibility you need.
- Add README: Leave this Off.
- Add .gitignore: Leave this as No .gitignore.
- Add license: Leave this as No license.
- Click Create repository.
- General
Setup screen
- After the repository is created, GitHub shows the setup screen.
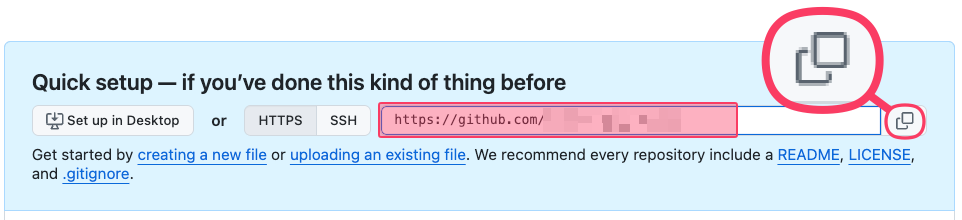
- Copy the repository URL.
- This URL will be used in the first publish commands after configuring project settings and turning on Github pages.
- Copy the repository URL.
Project configuration #settings
-
Update the project information in [[zensical.toml]].
-
- Line 3: Change
My site name hereto the name that should appear in the site header and browser tab. - Line 4: Replace
usernameandrepositorywith the GitHub account and repository name. - Line 9: Use the GitHub repository address, copied in the setup screen section.
- Line 10: Use the repository name.
- Line 3: Change
-
Turning on [[Github]] Pages and first push
- GitHub Pages is the GitHub feature that turns the repository into a website.
- In the GitHub repository, open Settings > Pages.
- Under Build and deployment, set Source to GitHub Actions.
-
Run the following in the site folder
cd /path/to/my-site-folderin [[terminal]]:-
- Line 5: Replace your repository URL with
https://github.com/USERNAME/REPOSITORY.git.
- Line 5: Replace your repository URL with
-
Publish changes later
- After the first publish, VS Code Source Control is the easiest way to send changes to GitHub.
- In VS Code:
- Open the Knotis site folder.
- Edit and save your Markdown files, images, and
zensical.toml. - Open the Source Control view.
- Review the changed files.
- Type a short commit message, such as
Update week 3 notesor simplyEdit. - Click Commit.
- Click Sync Changes.
- In VS Code: