Outlining
[[Outlining]]
- Pages are written in [[Markdown]].
- A quick reference is available at Markdown Guide: Cheat Sheet.
- One important difference in Knotis: pages are organized as outlines.
- Headings create the main sections.
- Under each heading, content is written as bullets.
- Paragraph-style writing is avoided, so each idea has a clear place in the outline.
- A bullet outline states the structure directly.
- A child bullet belongs to the bullet above it.
- A grandchild bullet belongs to its parent, and so on.
- A child bullet belongs to the bullet above it.
- This outline structure helps the site understand how ideas are connected.
- Headings create the main sections.
- Knotis parses this nesting and uses it for three things:
- [[Pane]] context. When a pane opens, it shows the customized number of bullets.
- [[Graphs|Graph]] edges. A concept nested under another concept becomes a parent to child edge.
- [[Content tags]] boundaries. Content tags use the nesting to know where a block starts and ends.
[[Knotis VS Code extension|Writing with the VS Code extension]]
- The [[Knotis VS Code extension]] is recommended for writing pages.
- It provides a preview while writing and includes editing tools.
[[Bullets]]
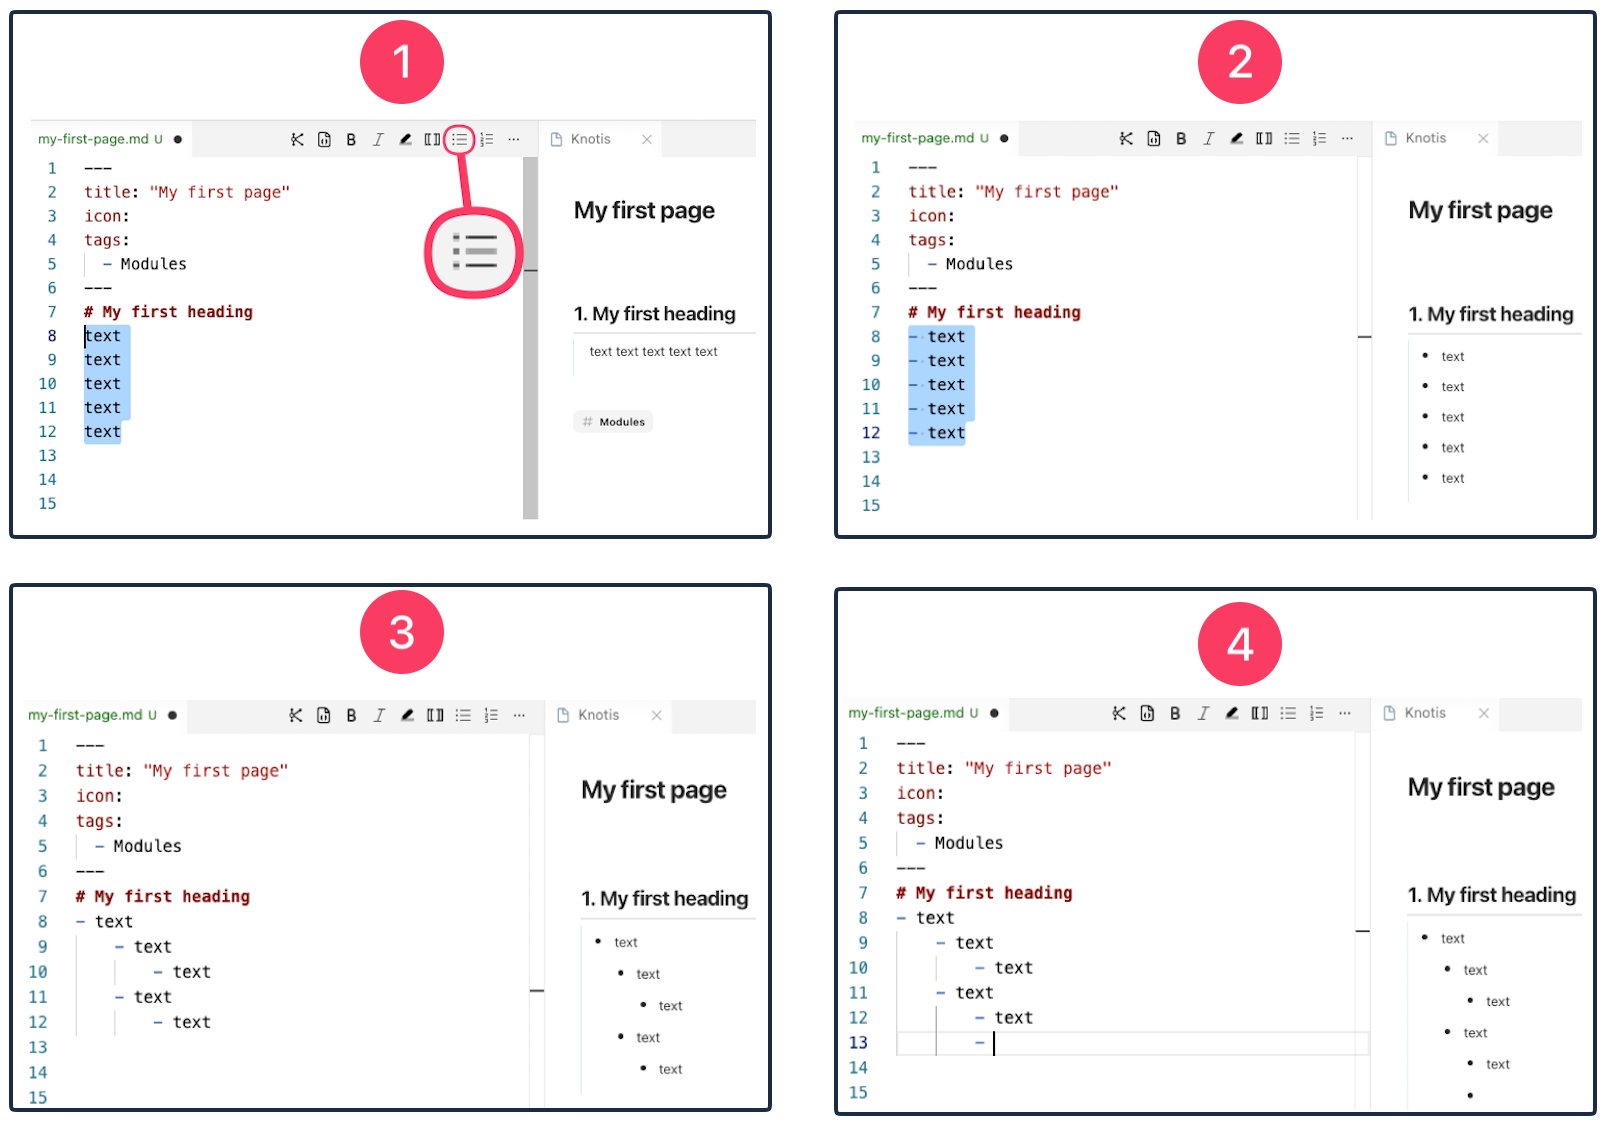
- Place the cursor anywhere on a plain text line (or highlight), then click the Bullet List icon.
- The list has bullets.
- Click the icon again to remove the bullets.
- Press Tab to indent a list item and make it a child item.
- Press Shift+Tab to outdent it.
-
Press Enter while editing a bulleted list:
- At the end of a list item, it creates the next sibling item.
- In the middle of a list item, it splits the text into two sibling items.
- On a blank nested list marker, it outdents one level.
- On a blank top-level list marker, it clears the marker and exits the list.
[[Numbered list]]
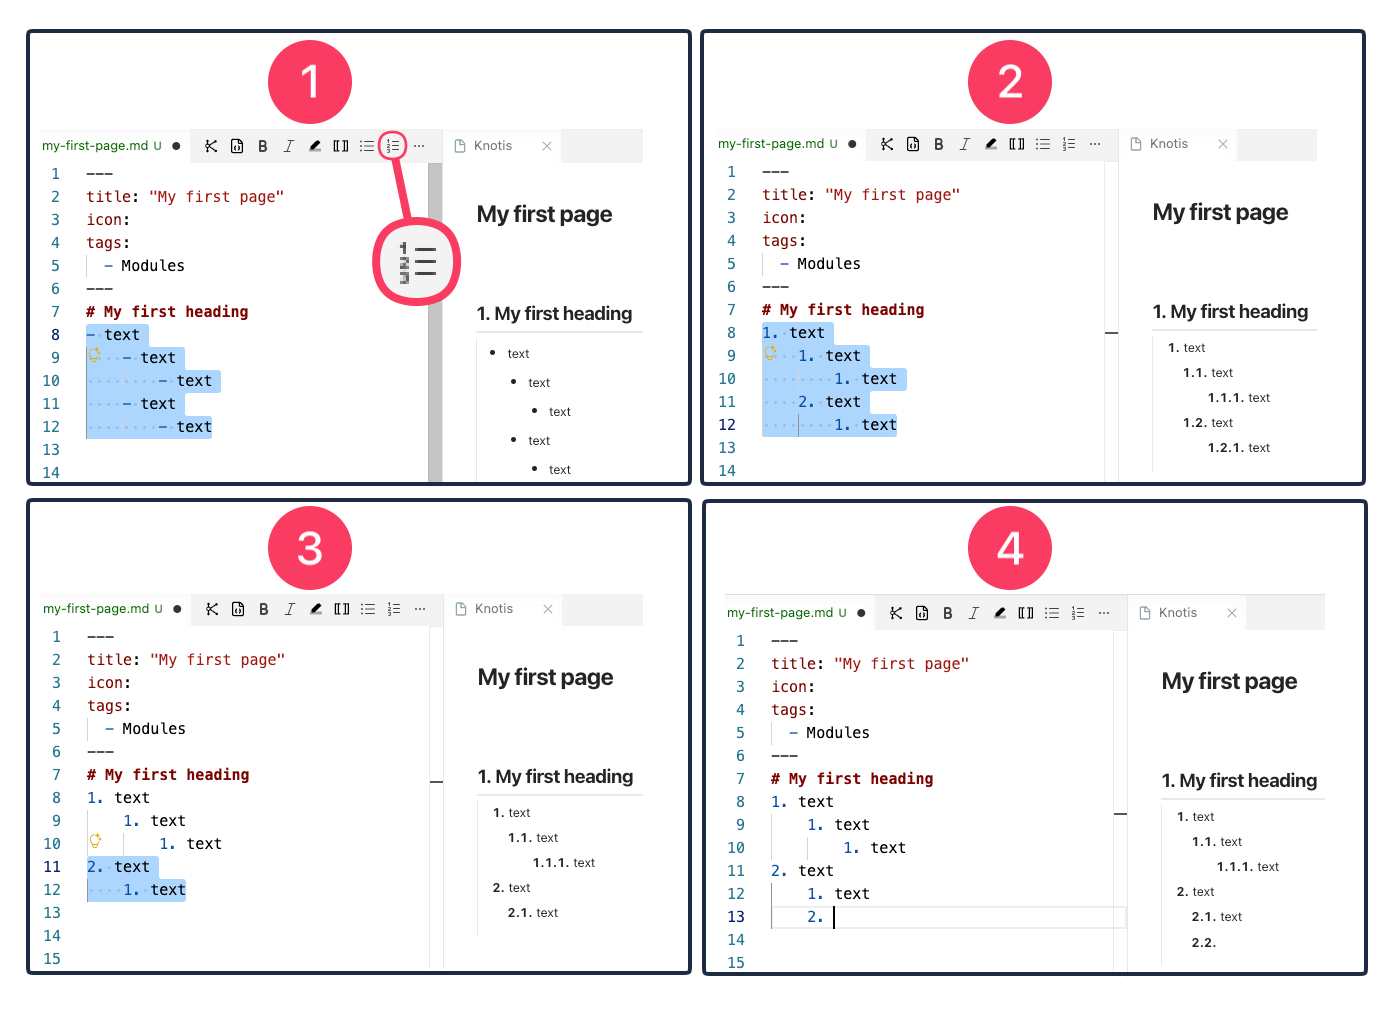
- Place the cursor anywhere on a plain text line or bullet (or highlight), then click the Numbered List icon.
- The list has nested numbers.
- Click the icon again to remove the numbering.
- Press Tab to indent a list item and make it a child item.
- Press Shift+Tab to outdent it.
- Press Enter while editing a numbered list:
- At the end of a list item, it creates the next sibling item.
- In the middle of a list item, it splits the text into two sibling items.
- On a blank nested list marker, it outdents one level.
- On a blank top-level list marker, it clears the marker and exits the list.
-
-
Nesting depth #tip
- Three or four levels of nesting is normal.
- A heading,
- a bullet under it,
- a child bullet, and
- sometimes a grandchild bullet for a worked detail.
- a child bullet, and
- a bullet under it,
- A heading,
- Nesting deeper than that usually means the section should be split into a new heading instead.
- Three or four levels of nesting is normal.
[[Bullets]] and [[numbered list]] together
- A heading or bullet can introduce a list, and its children can switch from bullets to numbers. For example:
- Grandparent bullet
- Parent item 1 (parent sibling 1)
- Parent item 2 (parent sibling 2)
- Child item 1 (child sibling 1)
- Child item 2 (child sibling 2)
[[Markdown table]]
- Place the cursor anywhere on the first row of the markdown table, then click the Numbered List icon.
- A selected Markdown table becomes one list item. Only the first row gets the bullet.
- Tab for indenting and Shift+Tab for outdenting:
- When the cursor is inside a table, the whole block moves together.
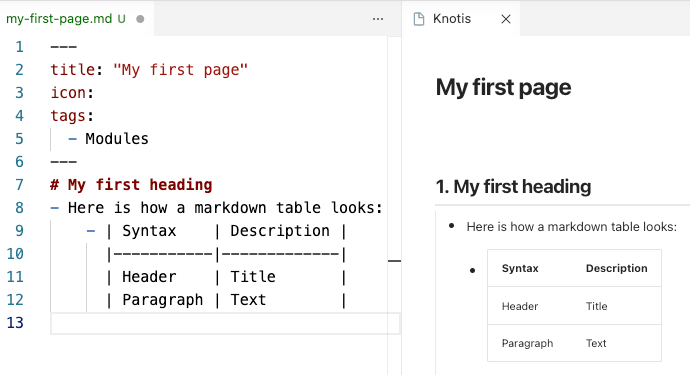
- Here is how a markdown table looks:
[[Image]]
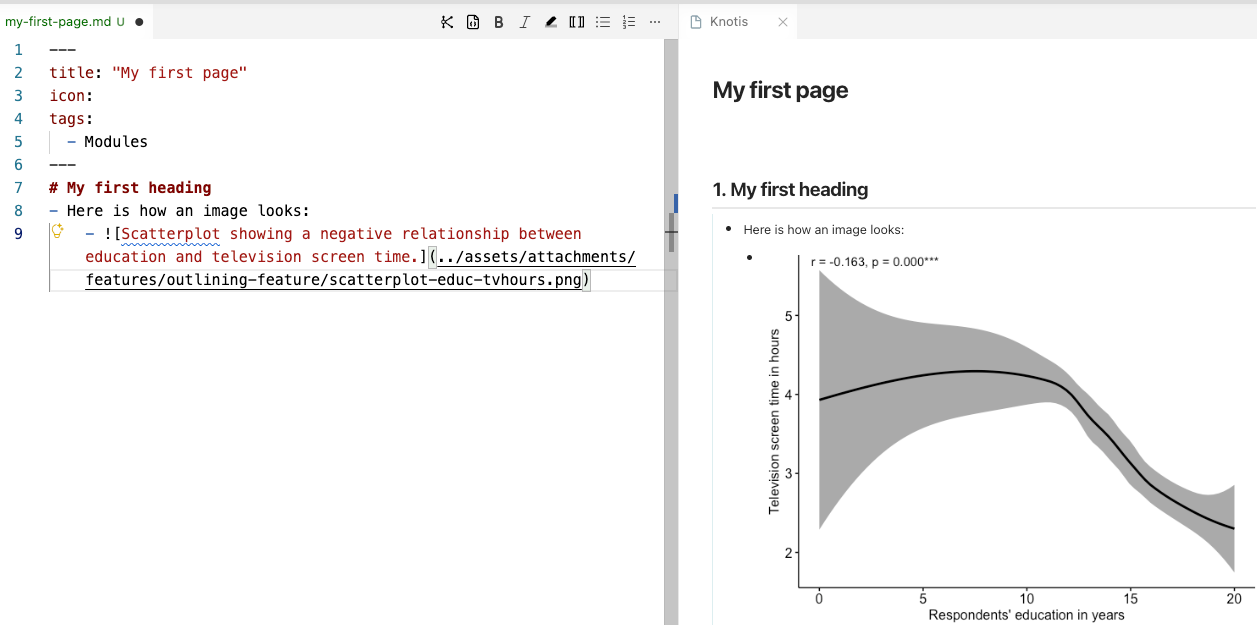
- Save the image to the [[assets folder]].
- Copy the image:
- Ctrl+C
- Cmd+C
- Place the cursor on the line where the image should go, then press:
- Ctrl+V
- Cmd+V
- Place the cursor anywhere on the pasted text (or highlight), then click the Bullet List icon.
- Replace the placeholder
[alt text]with a short description of what the image shows, or, if decorative, leave it blank,[].
- Here is how an image looks:
[[Mermaid diagram]]
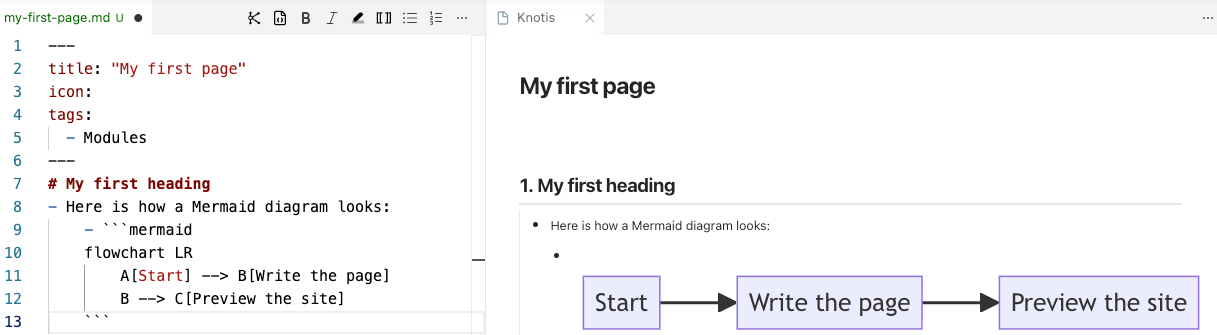
- Place the cursor where the diagram should go.
- Add a fenced code block
```and writemermaidafter the opening backticks. - Place the cursor anywhere on the first line of the diagram block (or highlight), then click the Bullet List icon.
- The whole diagram becomes one list item.
- Press Tab to indent the diagram under the bullet or heading it belongs to.
- Here is how a Mermaid diagram looks:
[[Admonition]]
- Place the cursor where the admonition box should go.
- Type
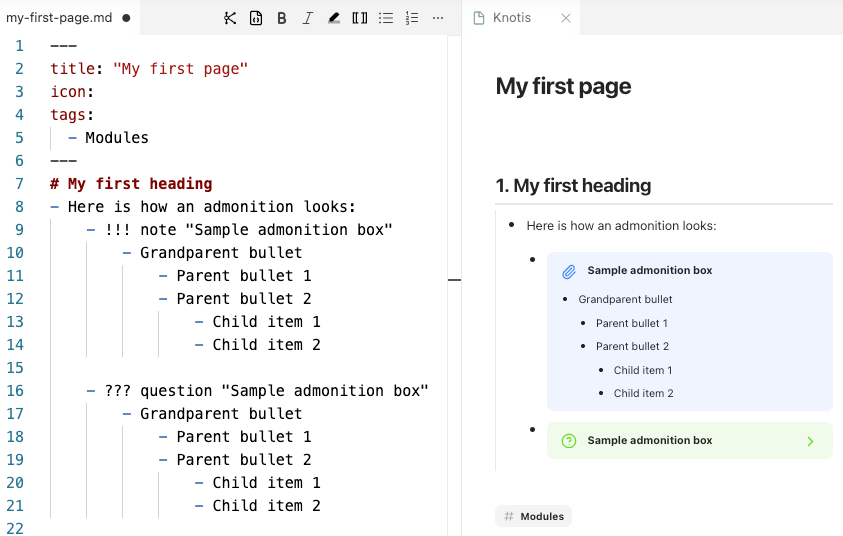
!!!, the admonition type, and the title in quotation marks.- For example,
!!! note "Sample admonition box". - Use
???instead of!!!to make the box closed and expandable. - Use
???+to make the box open, but still closable. - Available types:
note,abstract,info,tip,success,question,warning,failure,danger,bug,example,quote.
- For example,
- Write the content of the box as indented bullets under that first line.
- Place the cursor anywhere on the first line of the admonition block (or highlight), then click the Bullet List icon.
- The whole admonition becomes one list item.
- Press Tab to indent the admonition under the bullet or heading it belongs to.
- To add child bullets after the admonition box, leave a blank line after the box content.
- Here is how an admonition looks:
[[Code block]]
- Place the cursor where the code should go.
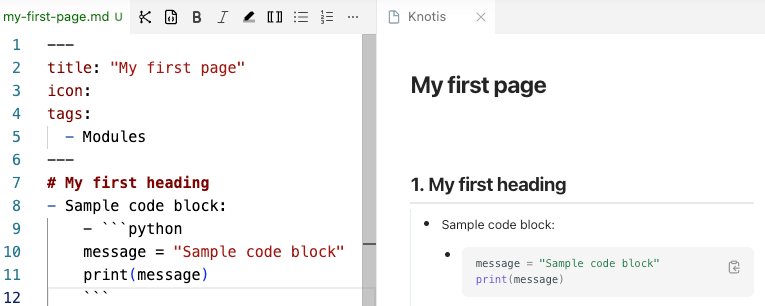
- Add a fenced code block
```and write the language name after the opening backticks.- For example, use
python,r,bash, ortext.
- For example, use
- Place the cursor anywhere on the code block (or highlight), then click the Bullet List icon.
- The whole code block becomes one list item.
- Press Tab to indent the code block under the bullet or heading it belongs to.
- Here is how a code block looks:
[[Video]]
- Save the video to the [[assets folder]].
- Copy the video file:
- Ctrl+C
- Cmd+C
- Place the cursor on the line where the video should go, then press:
- Ctrl+V
- Cmd+V
- Place the cursor anywhere on the pasted text (or highlight), then click the Bullet List icon.
- Replace the placeholder
[alt text]with a short description of what the video shows.- Files ending in
.mp4or.gifbecome media players in the site.
- Files ending in
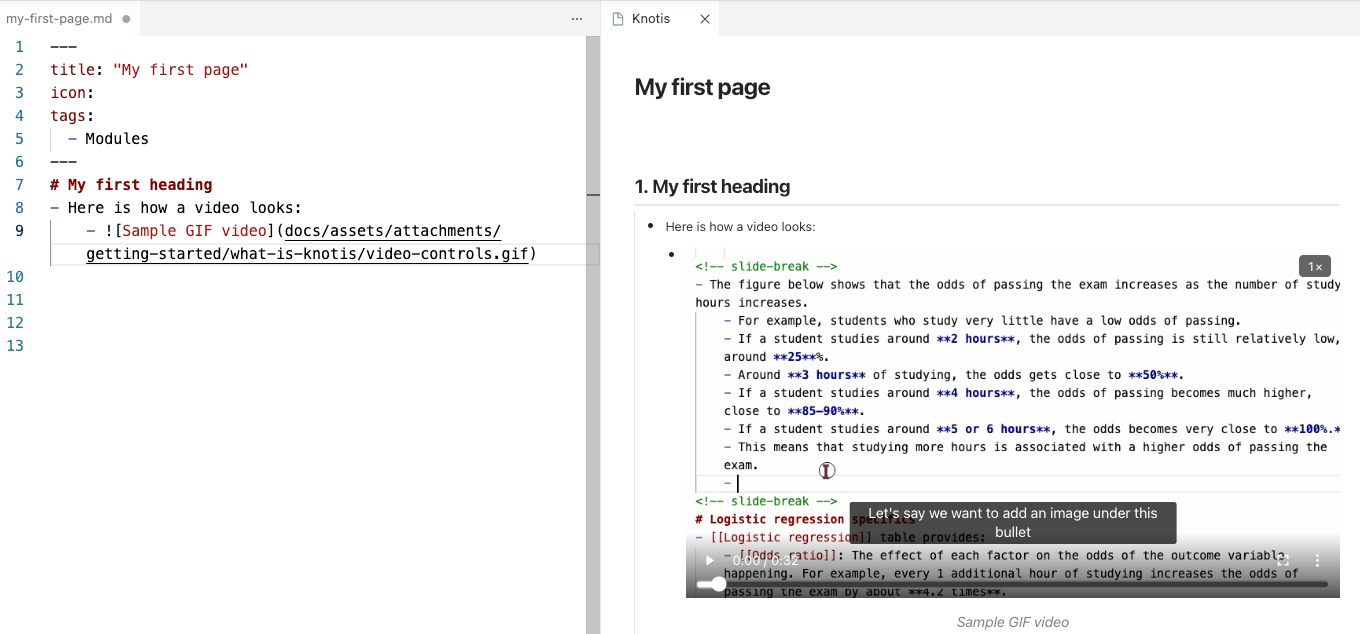
- Here is how a video looks: